検索条件
タグで絞り込み
Node.js(28)
Node.js::ESLint(2)
Node.js::Jest(18)
Node.js::Prettier(3)
Node.js::SWC(3)
Node.js::npm(1)
Node.js::webpack(1)
Node.js::その他(2)
OS(16)
OS::Linux(6)
OS::Linux::CentOS(2)
OS::Linux::Ubuntu(2)
OS::Linux::コマンド(1)
OS::Windows(9)
OS::iOS(1)
Webサービス(4)
Webサービス::GitHub(2)
Webサービス::GitHub::GitHub Actions(2)
Webサービス::Slack(1)
Webサービス::さくらのレンタルサーバー(2)
ゲーム(1)
ゲーム::COM3D2(1)
ジャンル(11)
ジャンル::インターネット(1)
ジャンル::カンファレンス(1)
ジャンル::ガジェット(1)
ジャンル::サイト運営(1)
ジャンル::セットアップ(2)
ジャンル::旅行記(1)
ジャンル::調査(5)
ジャンル::雑記(2)
ソフトウェア(20)
ソフトウェア::Docker(2)
ソフトウェア::HTTPD(4)
ソフトウェア::HTTPD::nginx(4)
ソフトウェア::RDBMS(3)
ソフトウェア::RDBMS::SQLServer(2)
ソフトウェア::RDBMS::SQLite(1)
ソフトウェア::VSCode(4)
ソフトウェア::VisualStudio(1)
ソフトウェア::WSL(2)
ソフトウェア::その他(1)
ソフトウェア::ブラウザ(4)
ソフトウェア::ブラウザ::Chrome(2)
ソフトウェア::ブラウザ::Edge(3)
ネットワーク(2)
ネットワーク::HTTP(1)
ネットワーク::IPv6(1)
ライブラリ(22)
ライブラリ::Echo(2)
ライブラリ::Jinja(2)
ライブラリ::Next.js(6)
ライブラリ::React(12)
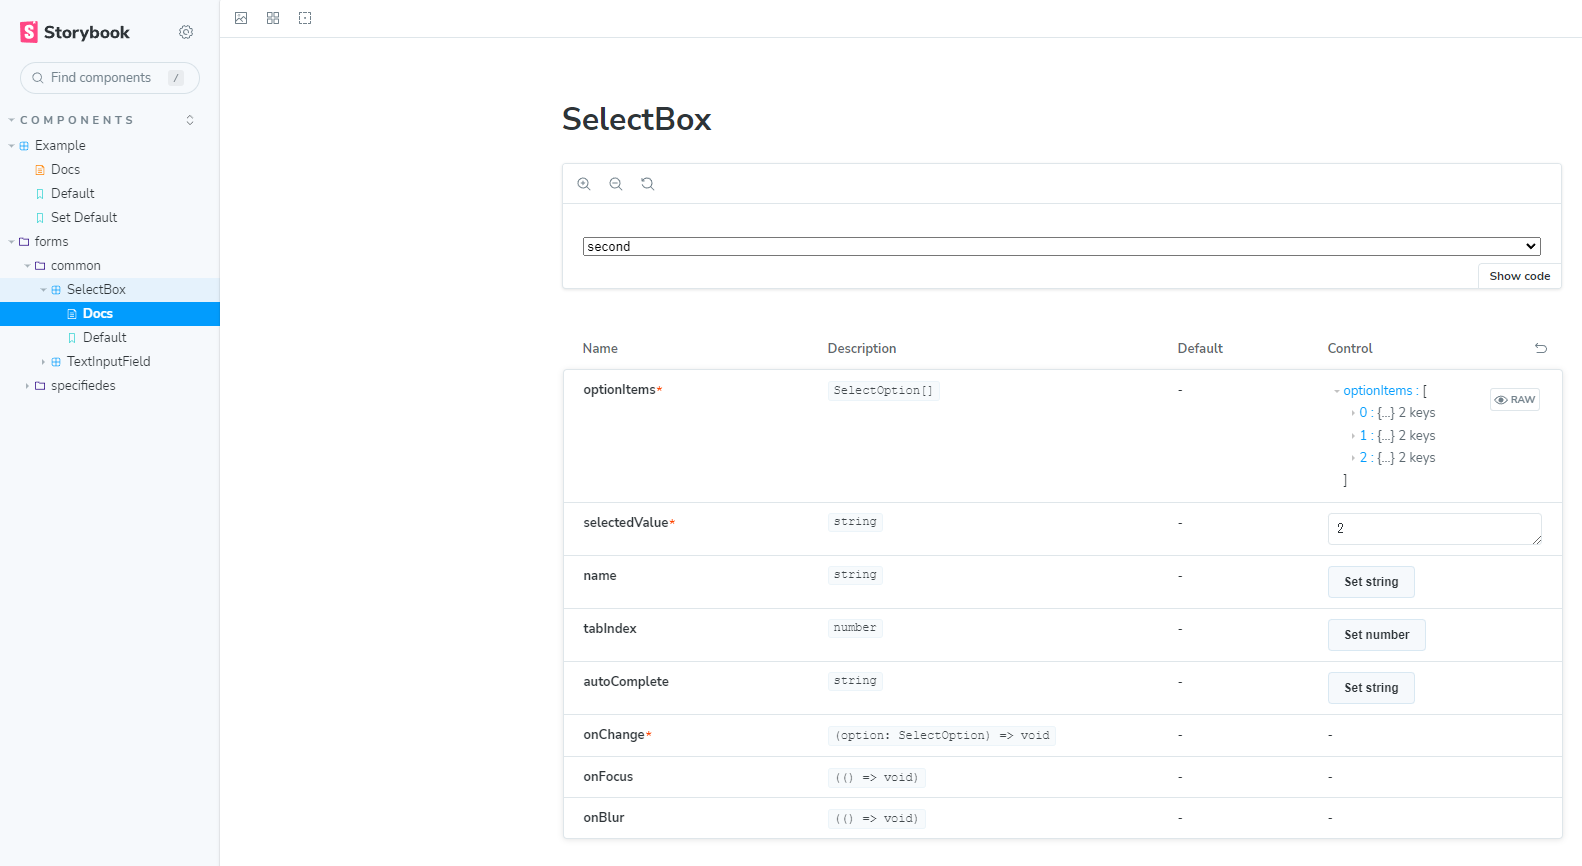
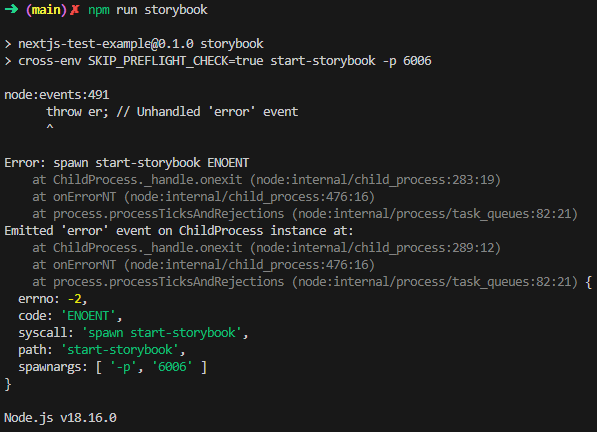
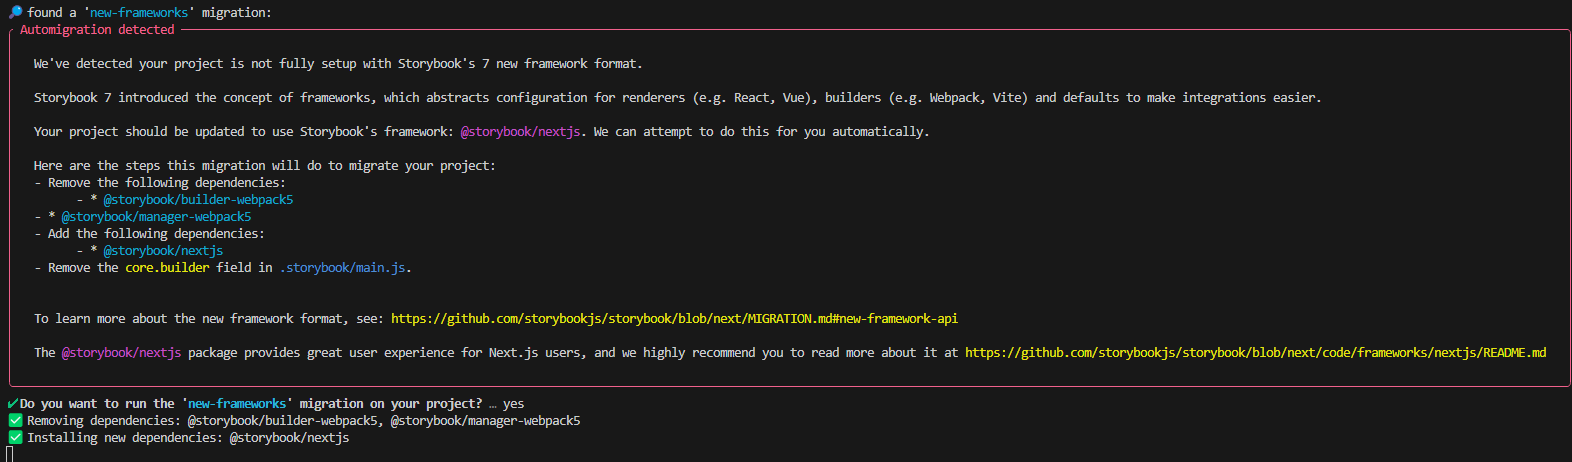
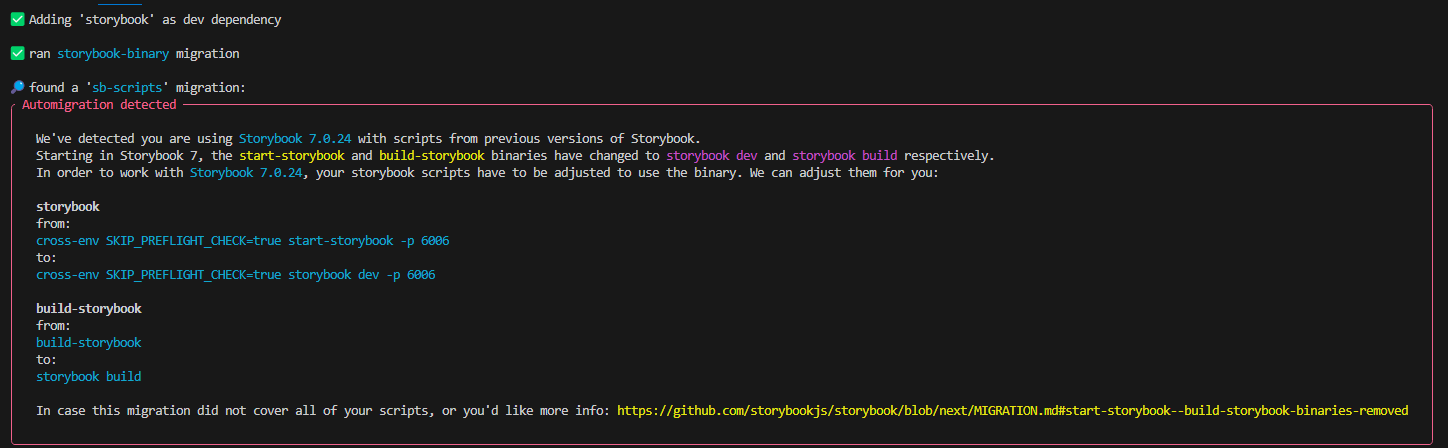
ライブラリ::Storybook(1)
ライブラリ::Windows Form(1)
技術(3)
技術::CGI(2)
技術::sendmail(1)
言語::C#.NET(7)
言語::CSS(6)
言語::Golang(4)
言語::HTML(11)
言語::JavaScript(17)
言語::JavaScript::CommonJS(4)
言語::JavaScript::ES Module(2)
言語::Markdown(5)
言語::PHP(17)
言語::PHP::Xdebug(3)
言語::Perl(10)
言語::PowerShell(5)
言語::Python(3)
言語::TypeScript(37)
言語::batファイル(2)
言語::正規表現(2)
開発(30)
開発::Web(3)
開発::テスト(19)
開発::自動化(3)
開発::設計(6)