検索条件
お知らせ
現在サイトのリニューアル作業中のため、全体的にページの表示が乱れています。
前のページ
6
7
8
9
10
11
12
13
14
15
次のページ
run
コマンドでサービスを指定してコマンドを蹴ると実行結果が取れる
e.g. docker-compose run node-git 'npm' 't'
コマンドを複数繋げる場合はシェルを呼び出してやる
e.g. docker-compose run node-git 'sh' '-c' '"ls -la && grep foo"'
xrdp
が入っていなければxrdp
をインストール
Desktop版なら最初から入ってた気もする
3389
ポートを開ける
sudo ufw allow 3389
オートログインを殺す
sudo sed -ie 's/AutomaticLoginEnable=true/AutomaticLoginEnable=false/' /etc/gdm3/custom.conf
あとは再起動してWindowsのリモートデスクトップから繋げて画面が映ればOK
sudo reboot
pkill gnome-session
でログインセッションを殺す
sudo nano /etc/xrdp/startwm.sh
して以下の内容を追記する
export DESKTOP_SESSION=ubuntu
export GNOME_SHELL_SESSION_MODE=ubuntu
export XDG_CURRENT_DESKTOP=ubuntu:GNOME
レンタルサーバーだってリッチにしたい!という想いの記事です。
zsh
が使える
dircolors
が使える(ls
の色分けができる)
nano
が使える
.zshrc
の編集については各々の設定があると思うので適宜読み替えてください
chsh -s /usr/local/bin/zsh
.zshrc
一式を突っ込む
https://github.com/Lycolia/my-zsh-conf
.zshrc
のfor sakura internet
以下のコメントを外して有効化する
command not found: dircolors
を解消するために次項の手順でcoreutils
を導入する
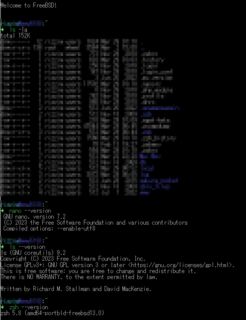
GNU lsとdircolorsの導入により、ls
に色付けが出来るようにします
mkdir local
wget https://ftp.gnu.org/gnu/coreutils/coreutils-9.2.tar.xz
xz -dc coreutils-9.2.tar.xz | tar xf -
cd coreutils-9.2/
./configure --prefix=/home/<user-name>/local/
make
make install
wget https://www.nano-editor.org/dist/v7/nano-7.2.tar.xz
xz -dc nano-7.2.tar.xz | tar xf -
cd nano-7.2/
./configure --prefix=/home/<user-name>/local/ --enable-color --enable-nanorc
make
make install
cp doc/sample.nanorc ~/.nanorc
# オートインデント有効化
perl -i -pe 's/^# (set autoindent)/$1/' ~/.nanorc
# シンタックスハイライト有効化
perl -i -pe 's/^# (include .+\/local\/share\/nano\/\*.nanorc)/$1/' ~/.nanorc
JavaScriptで添付ファイルを拾うのと、ファイルを落とす処理のサンプルコード
<html>
<head>
<meta charset='utf-8'>
<title>js file up/dl example</title>
<script>
window.onload = () => {
const fr = new FileReader();
const el = document.getElementById("test");
fr.onload = (ev) => {
const dl = document.createElement('a');
dl.setAttribute('href', ev.target.result);
dl.setAttribute('download', el.files[0].name);
dl.style.display = 'none';
document.body.appendChild(dl);
dl.click();
document.body.removeChild(dl);
};
el.onchange = () => {
fr.readAsDataURL(el.files[0]);
};
};
</script>
</head>
<body>
<input type="file" id="test"></input>
</body>
</html>
Env
Ver
Windows
10 pro
PHP
8.0.2 NTS Visual C++ 2019 x64
nginx
1.19.8
nginx.conf
を開きFastCGI server listening on 127.0.0.1:9000
辺りに次の設定をする
location ~ \.php$ {
root html;
fastcgi_pass 127.0.0.1:9000;
fastcgi_index index.php;
fastcgi_param SCRIPT_FILENAME C:/nginx/html/$fastcgi_script_name;
include fastcgi_params;
}
設定したフォルダに.php
ファイルを配置
nginx
を起動
php-cgi.exe -b 127.0.0.1:9000
.php
ファイルにアクセス
前のページ
6
7
8
9
10
11
12
13
14
15
次のページ