- 投稿日:
ESM化が叫ばれて久しいですが、未だにJestはESMとCJSが混在したコードを処理してくれません。
Getting StartedにもSWCに対する言及がないので、きっともう忘れられているのでしょう。swc-project/jestの方も特にやる気はなさそうだし、やりたければ自分でPR書きましょうって感じだと思います。きっと。
確認環境
node_modules配下にESMで作られたモジュールが存在し、コードはTypeScript、トランスパイルにはSWCを利用する。
| Env | Ver |
|---|---|
| @swc/cli | 0.1.62 |
| @swc/core | 1.3.92 |
| @swc/jest | 0.2.29 |
| @swc/register | 0.1.10 |
| jest | 29.7.0 |
| typescript | 5.2.2 |
やったけど意味がなかったこと
package.jsonのtypeをmoduleにするjest.config.jsのtransformIgnorePatternsにESMモジュールのパスだけ除外する設定を書く- 上記に加えて
transform.jsc.pathにpkg-name: ['node_modules/pkg-name']を追記する node --experimental-vm-modules node_modules/jest/bin/jest.jsで実行する- 多少マシになったがコケるものはコケる
- ESMで書かれたモジュールを丸ごとモックする
- 一切効果なし
所感
多分Webpackでバンドルしてnode_modulesの中身も外も関係ない状態にするのが一番無難なのではないかと思いました。
Node.jsの組み込みテストランナーにすれば解決するかな?と思ったものの、こちらは現状SWCでは使えそうにないので諦めました。
参考までに以下のコマンドで走らさせられます。
node --require @swc/register --test ./src/**/*.spec.ts
取り敢えずESMに引っかったモジュールはCJS時のバージョンを維持しておくことにしましたが、このままだとSWC使えないし、なんとかなって欲しいですね。Webpack使えば解決できるのはわかるんですが、このために使いたくないので、テストを重視する場合、Vitestを持つViteが有力候補になって来そうです。
2024-02-17追記
esbuild + Node.js built-in test runnerの組み合わせであればテストはできるが肝心の実行ができず無意味だった
- 投稿日:
undefinedの判定方法が複数あるということでundefined判定の処理速度比較をしてみたのでその結果。
端的に言うと、hoge === undefinedとtypeof hoge === 'undefined'の二方式がある。後者は原則考慮不要だが、言語仕様上存在しているので比較したが、現実的に見た場合、どちらで記述した場合でも処理速度に有意な差はないように感じた。
確認環境
| Env | Ver |
|---|---|
| Node.js | 20.1.0 |
| TypeScript | 4.9.5 |
| @swc/core | 1.3.8 |
比較結果
hoge === undefinedの方が早く見えるが実行するタイミングで変わるので誤差の範疇だと思う。
| 方式 | ms |
|---|---|
hoge === undefined |
4,514 |
typeof hoge === 'undefined' |
4,515 |
確認コード
const tyof = (param?: string) => {
  return typeof param === 'undefined';
};

const undef = (param?: string) => {
  return param === undefined;
};

const tyStart = +new Date();
for (let i = 0; i < 10000000000; i++) {
  tyof();
}
console.log('typeof', +new Date() - tyStart);

const unStart = +new Date();
for (let i = 0; i < 10000000000; i++) {
  undef();
}
console.log('undefined', +new Date() - unStart);
TSから生成されたJS
"use strict";
Object.defineProperty(exports, "__esModule", {
    value: true
});
const tyof = (param)=>{
    return typeof param === 'undefined';
};
const undef = (param)=>{
    return param === undefined;
};
const tyStart = +new Date();
for(let i = 0; i < 10000000000; i++){
    tyof();
}
console.log('typeof', +new Date() - tyStart);
const unStart = +new Date();
for(let i = 0; i < 10000000000; i++){
    undef();
}
console.log('undefined', +new Date() - unStart);
あとがき
MDNを読む限りtypeof hoge === 'undefined'は該当変数が存在しない場合に有用なようであるが、TypeScriptで書いている場合、通常このようなコードが生まれることがなく、仮に起きるとした場合、次のようなコードになるため現実的に考慮する必要はない。なおMDNにも「こんなことはしないこと」と書いてあるので、一般的なコードでないことは客観的にも伺えるだろう。
(() => {
  const undefined = 123;
  const hoge = undefined;

  if (typeof hoge === 'undefined') {
    console.log('hoge is undefined');
  } else {
    console.log('hoge is not undefined');
  }
})();
上記コードの実行結果としてはhoge is not undefinedが出力される。
このコードの主な問題点
const undefined = 123;というコードは予約語を変数名にしているため、混乱を招くコードであり、書かないことが好ましい- MDNには予約語ではないとあるが、一般的には予約語の一つとして解釈して支障ないと考える
- このコードはESLintのeslint:recommendedで検知されるため、通常であれば書かれることはない
なお、このコードは例示のために即時実行関数形式で記述しているが、必要がない限りこの形式での実装は避けたほうが問題が少なくなると思う。これは不必要なネストが生まれたり、スコープの混乱を生むためである。
- 投稿日:
本記事ではTypeScriptとSWC、Jestの組み合わせ環境でjest.spyOnを使う方法をexportパターン別に書いていきます。また、jest.spyOn対象の実装の詳細はテストせず、モック化したインターフェースのテストのみを行う前提で書いています。
確認環境
| Env | Ver |
|---|---|
| Node.js | 18.14.0 |
| typescript | 4.9.5 |
| @swc/cli | 0.1.62 |
| @swc/core | 1.3.36 |
| @swc/jest | 0.2.24 |
| jest | 29.4.3 |
サンプルコード
全編は以下にあります
jest.spyOn pattern example for SWC + TypeScript
親関数から子関数を呼び出すパターンで、子関数のjest.spyOnをするシチュエーションで考えます。
default export編
以下のdefaultエクスポートをjest.spyOnする方法です。
child.ts
export const child = (param: string) => {
  return param;
};
parent.ts
import child from 'src/default/child';

const parent = (param: string) => {
  return child(param);
};

export const Parent = {
  parent,
};
parent.spec.ts
この形式の場合import側では書き換え不能なのでファイルごとモックにして解決します。
このやり方はファイルごとモックするため、同じファイルにある関数をjest.spyOnするのには向いていません。
import * as child from 'src/default/child';
import { Parent } from 'src/default/parent';

jest.mock('src/default/child');

describe('default', () => {
  it('called by child function', () => {
    const spiedChild = jest.spyOn(child, 'default');
    Parent.parent('foo');

    expect(spiedChild).toHaveBeenCalledWith('foo');
  });
});
named export編
以下の名前付きエクスポートをjest.spyOnする方法です。
child.ts
export const child = (param: string) => {
  return param;
};
parent.ts
import { child } from 'src/named-export/child';

export const parent = (param: string) => {
  return child(param);
};
parent.spec.ts
default exportと同じくimport側では書き換え不能なのでファイルごとモックにして解決します。
このやり方はファイルごとモックするため、同じファイルにある関数をjest.spyOnするのには向いていません。
import * as child from 'src/named-export/child';
import { parent } from 'src/named-export/parent';

jest.mock('src/named-export/child');

describe('function', () => {
  it('called by child function', () => {
    const spiedChild = jest.spyOn(child, 'child');
    parent('foo');

    expect(spiedChild).toHaveBeenCalledWith('foo');
  });
});
namespace export編
やり方はnamed export編と同じです。
child.ts
export namespace Child {
  export const child = (param: string) => {
    return param;
  };
}
parent.ts
import { Child } from 'src/namespace/child';

export namespace Parent {
  export const parent = (param: string) => {
    return Child.child(param);
  };
}
parent.spec.ts
namespaceの場合、トランスパイル後にクロージャになり、書き換え以前に関数にアクセスできなくなるため、ファイルごとモックにして解決します。
このやり方はファイルごとモックするため、同じファイルにある関数をjest.spyOnするのには向いていません。
import { Child } from 'src/namespace/child';
import { Parent } from 'src/namespace/parent';

jest.mock('src/namespace/child');

describe('namespace', () => {
  it('called by child function', () => {
    const spiedChild = jest.spyOn(Child, 'child');
    Parent.parent('foo');

    expect(spiedChild).toHaveBeenCalledWith('foo');
  });
});
module export編
これだけやり方が変わります。
child.ts
const child = (param: string) => {
  return param;
};

export const Child = {
  child,
};
parent.ts
import { Child } from 'src/module/child';

const parent = (param: string) => {
  return Child.child(param);
};

export const Parent = {
  parent,
};
parent.spec.ts
このケースの場合オブジェクトをexportしていて書き換えができるため、モック化せずにそのままjest.spyOnすることが出来ます。
このやり方であれば、ファイルのモックはしないため、同じファイルにある関数をjest.spyOnする事ができますが、裏を返せばオブジェクトの書き換えが可能であるため、実装方法によっては予期せぬ不具合が生まれる可能性があり、危険です。
何かしらの悪意ある攻撃を受けた場合にオブジェクトがすり替わるなどすると致命的だと思います。
import { Child } from 'src/module/child';
import { Parent } from 'src/module/parent';

describe('module', () => {
  it('called by child function', () => {
    const spiedChild = jest.spyOn(Child, 'child');
    Parent.parent('foo');

    expect(spiedChild).toHaveBeenCalledWith('foo');
  });
});
おまけ:それぞれのトランスパイル結果
.spec.jsは省いてます
default export編
child.js
'use strict';
Object.defineProperty(exports, '__esModule', {
  value: true,
});
Object.defineProperty(exports, 'default', {
  enumerable: true,
  get: () => _default,
});
const child = (param) => {
  return param;
};
const _default = child;
parent.js
'use strict';
Object.defineProperty(exports, '__esModule', {
  value: true,
});
Object.defineProperty(exports, 'Parent', {
  enumerable: true,
  get: () => Parent,
});
const _child = /*#__PURE__*/ _interopRequireDefault(require('./child'));
function _interopRequireDefault(obj) {
  return obj && obj.__esModule
    ? obj
    : {
        default: obj,
      };
}
const parent = (param) => {
  return (0, _child.default)(param);
};
const Parent = {
  parent,
};
named export編
child.js
'use strict';
Object.defineProperty(exports, '__esModule', {
  value: true,
});
Object.defineProperty(exports, 'child', {
  enumerable: true,
  get: () => child,
});
const child = (param) => {
  return param;
};
parent.js
'use strict';
Object.defineProperty(exports, '__esModule', {
  value: true,
});
Object.defineProperty(exports, 'parent', {
  enumerable: true,
  get: () => parent,
});
const _child = require('./child');
const parent = (param) => {
  return (0, _child.child)(param);
};
namespace export編
child.js
'use strict';
Object.defineProperty(exports, '__esModule', {
  value: true,
});
Object.defineProperty(exports, 'child', {
  enumerable: true,
  get: () => child,
});
const child = (param) => {
  return param;
};
parent.js
'use strict';
Object.defineProperty(exports, '__esModule', {
  value: true,
});
Object.defineProperty(exports, 'Parent', {
  enumerable: true,
  get: () => Parent,
});
const _child = require('./child');
var Parent;
(function (Parent) {
  var parent = (Parent.parent = (param) => {
    return _child.Child.child(param);
  });
})(Parent || (Parent = {}));
module export編
child.js
'use strict';
Object.defineProperty(exports, '__esModule', {
  value: true,
});
Object.defineProperty(exports, 'Child', {
  enumerable: true,
  get: () => Child,
});
const child = (param) => {
  return param;
};
const Child = {
  child,
};
parent.js
'use strict';
Object.defineProperty(exports, '__esModule', {
  value: true,
});
Object.defineProperty(exports, 'Parent', {
  enumerable: true,
  get: () => Parent,
});
const _child = require('./child');
const parent = (param) => {
  return _child.Child.child(param);
};
const Parent = {
  parent,
};
この記事を書いた切っ掛け
一言でいうとTSC(TypeScript Compiler) からSWCに移行した際にjest.spyOnを使ったら、上手く使えずにハマったためです。
まずTypeScript + JestではTypeScriptをCJS(CommonJS) にトランスパイルするためjest.spyOnが有効でした。しかし、SWCはTypeScriptをESM(ES Modules) にトランスパイルします。ESMではjest.spyOnが有効になりません。
これはCJSではexportしたObjectの書き換えが可能なのに対し、ESMでは出来ないためです。(jest.spyOnは実行時にオブジェクトを書き換えることで動いています)
この対策としてファイルそのものをモックに置き換えることで、jestの管理下に起き、自由に書き換えられるようにするのが本記事のアプローチです。以前と異なり、呼び出している関数の実装の詳細を見ることはできなくなりましたが、これは単体テストの観点としては正しいため、ある意味本来の単体テストになったとも取れると考えています。(モックに元の処理を注入することで今まで通り実装の詳細を確認することも出来る可能性がありますが、確認してません)
- 投稿日:
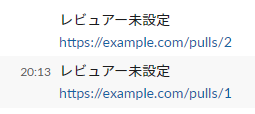
割とハマってだるいので今回はサンプル程度にPRの一覧を取得して個別にSlackに投げるものを作ってみます
PRが2個ある場合、出力イメージはこんな感じ。2投稿に分けて投稿します
API トークンの入手
まずはSlack APIを叩くためのトークンをゲットします
- Create an appからアプリを作成
- 左のメニューからFeatures -> OAuth & Permissions
- Scopesを設定
- 今回はBot Token Scopesを
chat:writeとします
- 今回はBot Token Scopesを
- 左のメニューからSettings -> Install App to Your Teamでアプリをインストール
- トークンが吐き出されるのでメモする
GitHub Actions Workflowsの作成
SECRETの設定
- Slack APIトークンをリポジトリのSecretsに突っ込んでおきます
- 名前は一旦
SLACK_TOKENとします
Workflowsの作成
前提
- PR一覧の取得には actions/github-script を利用します
- GitHub内部の情報を抜いたり、JSで処理を組みたいときに重宝します
- APIリファレンスが読みやすいので、使うのにはあんま苦労しないと思います
- Slack APIを叩くのにはcurlを利用します
- actions/github-scriptから叩くのは多分難しいです
ベースの作成
これに肉付けをしていきます
name: Post to slack example
on:
  workflow_dispatch:
jobs:
  post-slack:
    runs-on: ubuntu-latest
    steps:
PR一覧の取得
List pull requestsにある通りに進めていきます
- uses: actions/github-script@v6
  id: set-result
  with:
    result-encoding: string
    script: |
      const { data: respPulls } = await github.rest.pulls.list({
        owner: context.repo.owner,
        repo: context.repo.repo,
      });

      console.log(respPulls);
PR一覧の加工
こんなデータを取る感じで組んでいきます
API仕様は List pull requests を参照
type PullRequest = {
  id: number;
  reviewers: string[];
};
先ほど取得したrespPullsを上記の型付けになるように加工します
const getReviewersName = (requested_reviewers) => {
  return requested_reviewers.map((reviewers) => {
    return reviewers.login;
  });
};

const getPullRequests = (pulls) => {
  return pulls.map((pull) => {
    return {
      id: pull.number,
      reviewers: getReviewersName(pull.requested_reviewers),
    };
  });
};

const pulls = getPullRequests(respPulls);
Slackに投げるメッセージの作成
こんなメッセージをPRの数分組んでいきます
なお実際にSlackでメンションを作る場合はGitHubのスクリーン名とSlackのユーザー IDの突き合わせ処理が別途必要です。やり方は別途後述します
@foo @bar
https://example.com/pulls/1
やっていること
- 上記のフォーマットでメッセージを作成
- シェルスクリプトで配列として扱うためにBase64にエンコード
- 改行コードが混ざっていると扱いづらいので
- エンコードした文字列をスペース区切り文字列として連結
AAA BBB CCC ...みたいな
- 最後にWorkflowsの戻り値として設定しています
const encodedMessages = pulls.reduce((messages, pull) => {
  const reviewersBuff = pull.reviewers
    .reduce((acc, cur) => {
      return `${acc}${cur} `;
    }, '')
    .replace(/ $/, '');

  const reviewers = reviewersBuff === '' ? 'レビュアー未設定' : reviewersBuff;

  const message = `${reviewers}\\nhttps://example.com/pulls/${pull.id}`;
  const encodedMessage = Buffer.from(message).toString('Base64');

  return `${messages}${encodedMessage} `;
}, '');

return encodedMessages;
curlを利用してSlack APIを叩く
やっていること
encodedMessages=(${{steps.set-result.outputs.result}})- 前項で作った文字列を配列として取得しています
for message in ${encodedMessages[@]}- foreach的なやつです
- 改行コードがこの時点で存在すると上手くいきません
decoded_mes=$(echo ${message} | base64 -di)- ここでBase64エンコードをデコードします
postSlack "$decoded_mes"- 別引数にならないように
""で固めます
- 別引数にならないように
- curl叩いてるところ
-dの中をヒアドキュメントで展開するのが味噌です- 単純に文字列として扱うと変数展開が起きてJSONが壊れます
      - run: |
        postSlack() {
            local mes=$1

            curl -sS https://slack.com/api/chat.postMessage \
                -H 'Authorization: Bearer ${{ secrets.SLACK_TOKEN }}' \
                -H 'Content-Type: application/json; charset=UTF-8' \
                -d @- <<EOF
                {
                    token: "${{ secrets.SLACK_TOKEN }}",
                    channel: "#api-test",
                    text: "$mes"
                }
        EOF
        }

        encodedMessages=(${{steps.set-result.outputs.result}})

        for message in ${encodedMessages[@]}
        do
            decoded_mes=$(echo ${message} | base64 -di)
            postSlack "$decoded_mes"
        done
コード全体
name: Post to slack example
on:
  workflow_dispatch:
jobs:
  post-slack:
    runs-on: ubuntu-latest
    steps:
      - uses: actions/github-script@v6
        id: set-result
        with:
          result-encoding: string
          script: |
            const getReviewersName = (requested_reviewers) => {
              return requested_reviewers.map((reviewers) => {
                return reviewers.login;
              });
            };

            const getPullRequests = (pulls) => {
              return pulls.map((pull) => {
                return {
                  id: pull.number,
                  reviewers: getReviewersName(pull.requested_reviewers),
                }
              });
            }

            const { data: respPulls } = await github.rest.pulls.list({
              owner: context.repo.owner,
              repo: context.repo.repo,
            });

            const pulls = getPullRequests(respPulls);

            const encodedMessages = pulls.reduce((messages, pull) => {
              const reviewersBuff = pull.reviewers.reduce((acc, cur) => {
                return `${acc}${cur} `
              }, '').replace(/ $/, '');

              const reviewers = reviewersBuff === '' ? 'レビュアー未設定' : reviewersBuff;

              const message = `${reviewers}\\nhttps://example.com/pulls/${pull.id}`;
              const encodedMessage = Buffer.from(message).toString('Base64');

              return `${messages}${encodedMessage} `
            }, '');


            return encodedMessages;
      - run: |
          postSlack() {
            local mes=$1

            curl -sS https://slack.com/api/chat.postMessage \
                -H 'Authorization: Bearer ${{ secrets.SLACK_TOKEN }}' \
                -H 'Content-Type: application/json; charset=UTF-8' \
                -d @- <<EOF
                {
                    token: "${{ secrets.SLACK_TOKEN }}",
                    channel: "#api-test",
                    text: "$mes"
                }
          EOF
          }

          encodedMessages=(${{steps.set-result.outputs.result}})

          for message in ${encodedMessages[@]}
          do
              decoded_mes=$(echo ${message} | base64 -di)
              postSlack "$decoded_mes"
          done
Appendix:Slackにメンションを投げる方法
Slackへ実際にメンションを投げるのはユーザーIDを指定する必要があります
参考:Formatting text for app surfaces
"text": "<@U024BE7LH> Hello"のようにすることでメンションを投げられます
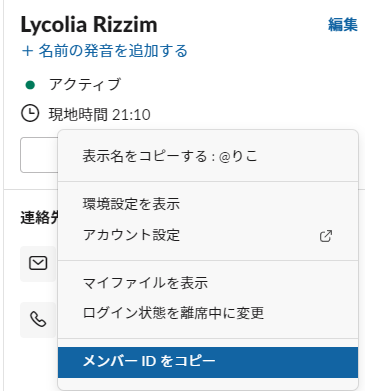
ユーザーIDはSlackアプリから相手のプロフィールを開き、そこにあるハンバーガーメニューみたいなやつから取れます。一応取得用のAPIもあります
- 投稿日:
確認環境
| Env | Ver |
|---|---|
| Node.js | 12.18.3 |
| Jest | 26.4.2 |
やりたいこと
以下の実装のときに、parentFunc()を呼んだ時にchildFunc()が呼ばれることをテストしたい
function parentFunc() {
  console.log('called parentFunc');
  childFunc('XXXX');
}

function childFunc(param) {
  console.log(`called childFunc ${param}`);
}
各ケース紹介
Case1 そもそも構文がおかしい
テストするためには関数をexportする必要あるが、愚直過ぎて構文的に実行不能になるケース
exports.parentFunc = () => {
  console.log('called parentFunc');
  // childFuncは別モジュールなので呼べない
  childFunc('XXXX');
};

exports.childFunc = (param) => {
  console.log(`called childFunc ${param}`);
};
Case2 スコープ違いでテストが失敗する
この実装を実行すると期待通り動作するので、一見すると大丈夫そうに見える
function parentFunc() {
  console.log('called parentFunc');
  childFunc('XXXX');
}

function childFunc(param) {
  console.log(`called childFunc ${param}`);
}

module.exports = { parentFunc, childFunc };
しかしこのテストを流すと失敗する
これはparentFunc()が呼び出すchildFunc()が下記case2の中にないため
parentFunc()のスコープ内にchildFunc()がいないことが原因
const case2 = require('./case2');
// こうするとjest.spyOn()の第一引数を満たせないので落ちる
// const { parentFunc, childFunc } = require('./case2');

describe('inside call test', function () {
  it('parentFunc', function () {
    const spy = jest.spyOn(case2, 'parentFunc');
    case2.parentFunc();
    expect(spy).toHaveBeenCalled();
  });
  it('childFunc', function () {
    const spy = jest.spyOn(case2, 'childFunc');
    case2.parentFunc();
    // childFuncはcase2に属していないため呼ばれない
    expect(spy).toHaveBeenCalled();
  });
});
Case3 テストが成功するケース
const parentFunc = () => {
  console.log('called parentFunc');
  // parentFunc()の中にchildオブジェクトを注入することで、
  // jestがchildFunc()を認識できるようにする
  child.childFunc('XXXX');
};

const child = {
  childFunc: (param) => {
    console.log(`called childFunc ${param}`);
  },
};

// childFuncでなく、childオブジェクトをexportするのが味噌
module.exports = { parentFunc, child };
const case3 = require('./case3');

describe('inside call test', function () {
  it('parentFunc', function () {
    const spy = jest.spyOn(case3, 'parentFunc');
    case3.parentFunc();
    expect(spy).toHaveBeenCalled();
  });
  it('childFunc', function () {
    // 注入している側のオブジェクトを参照する
    const spy = jest.spyOn(case3.child, 'childFunc');
    case3.parentFunc();
    // child.childFuncはcase3に属しているため呼ばれる
    expect(spy).toHaveBeenCalled();
  });
});